
Integrated Windows Authentication
Integrated Windows Authentication (IWA) is a Trustelem authentication using the Kerberos token of the user Windows session.
The point is to authenticate on Trustelem to access the apps, not to add MFA on Windows login.
For a user point of view, it's a passwordless authentication:
-
when a user logs in to his computer, he receives a Kerberos token from Active Directory.
-
when the user goes to Trustelem, the browser sends the Kerberos token from the computer to Trustelem.
-
Trustelem sends the Kerberos token to Active Directory in order to validate it.
If everything is ok, the user is logged in, with his identity based on the Kerberos token.
Trustelem admin configuration
The option « Integrated Windows Authentication » under security tab ( https://admin-mydomain.trustelem.com/app#/security) must be enabled.
In addition, you need to check the following points:
-
the IP range of your internal network must be properly set and the user authentication must come from this network (IWA is only enabled on the internal zone).
-
the authentications must be done through
https://mydomain.trustelem.com(Trustelem admin console does not allow IWA). -
a Trustelem ADConnect connector linked to your Active Directory (on a Windows machine) must be active and running.
-
the user whose Windows session is running must have been previously imported from your Active Directory server.
Note: your logs (https://admin-mydomain.trustelem.com/app#/logs) will have a login failure entry with the users identity if a user from your domain is identified by IWA but was not registered with Trustelem.
Server configuration
-
Connect to one of your servers as a domain administrator.
-
Open a command interpreter and enter the following command, after replacing 'trustelem-user' with the name of the user running Trustelem ADConnect connector, and 'mydomain' by the name of your Trustelem subscription domain:
setspn -s HTTP/mydomain.trustelem.com trustelem-user
Client configuration
Enabling IWA on your clients is a browser-specific operation.
-
Connect to a domain controller as a domain administrator
-
Download the file present in this link https://support.google.com/chrome/a/answer/187202
/!\ if the IWA for Chrome stops working, you may need to redownload the file and reinstall the GPO.
For exemple, Chrome version 86 broke compatibility with the previous Chrome GPO. -
Extract the folder
-
Open the Group Policy Management Console (gpmc.msc)
-
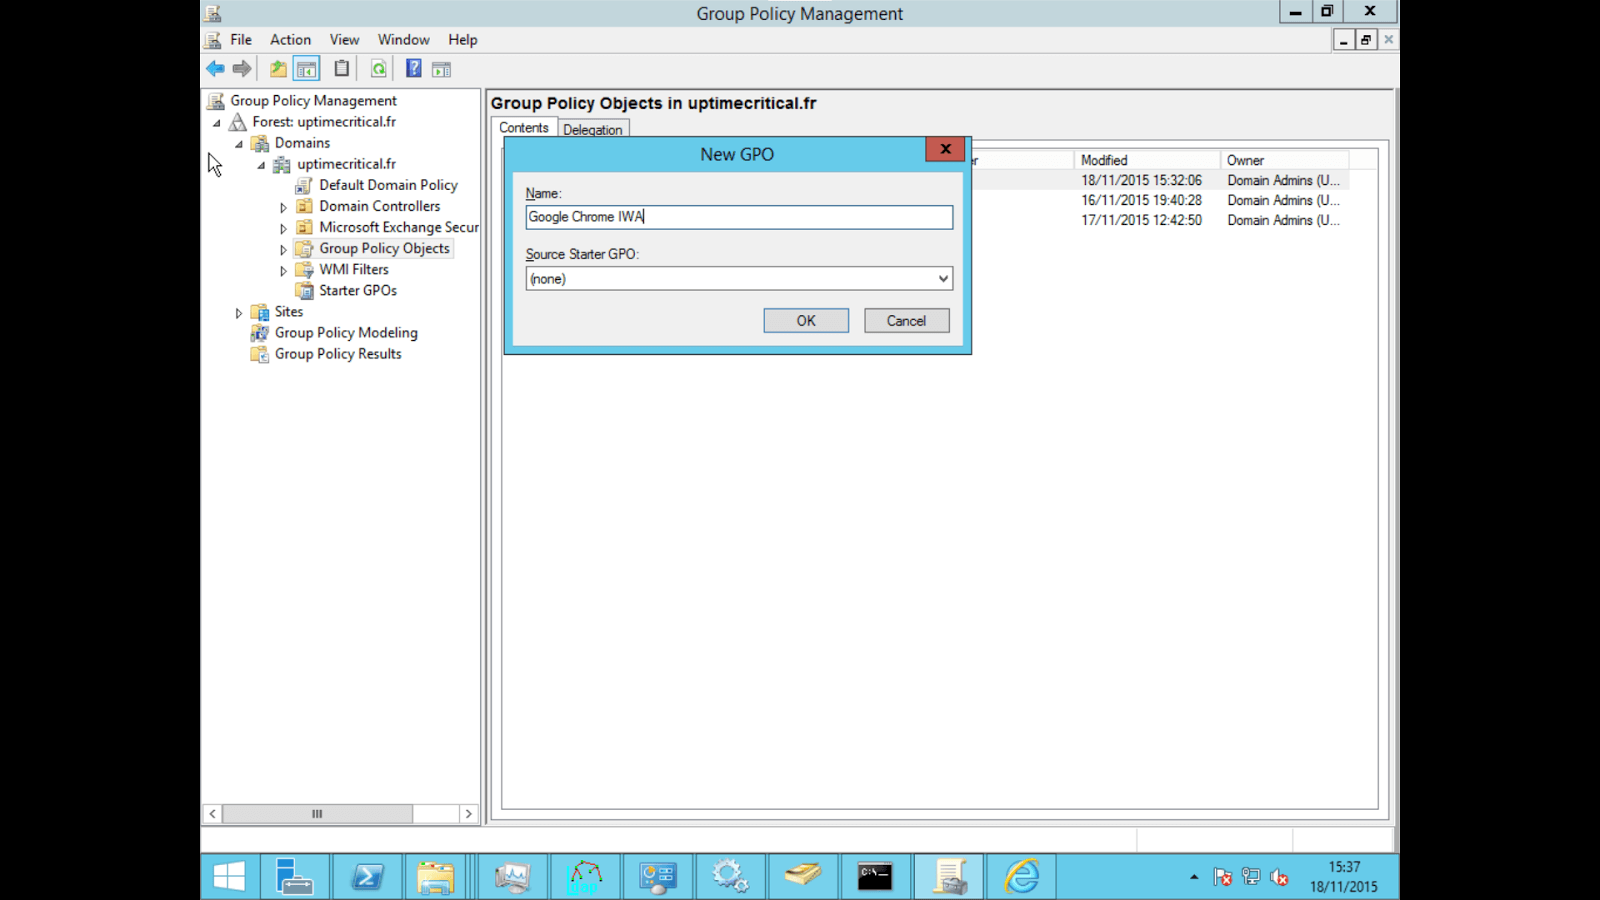
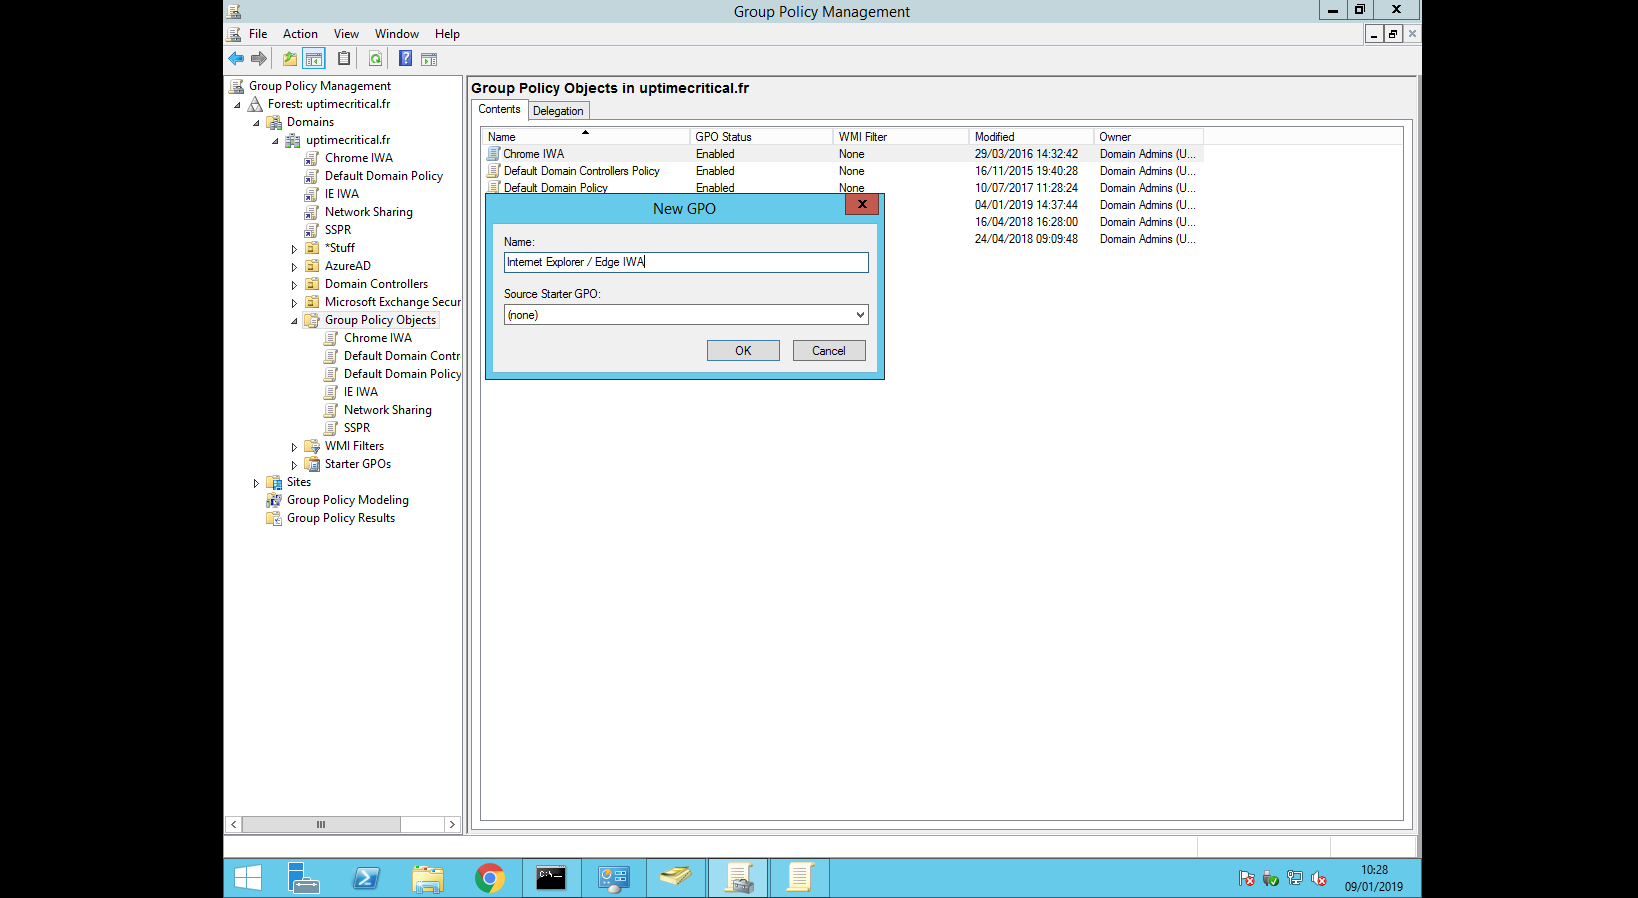
Choose an existing GPO or create a new one
-
Edit the policy (Right click > Edit)
-
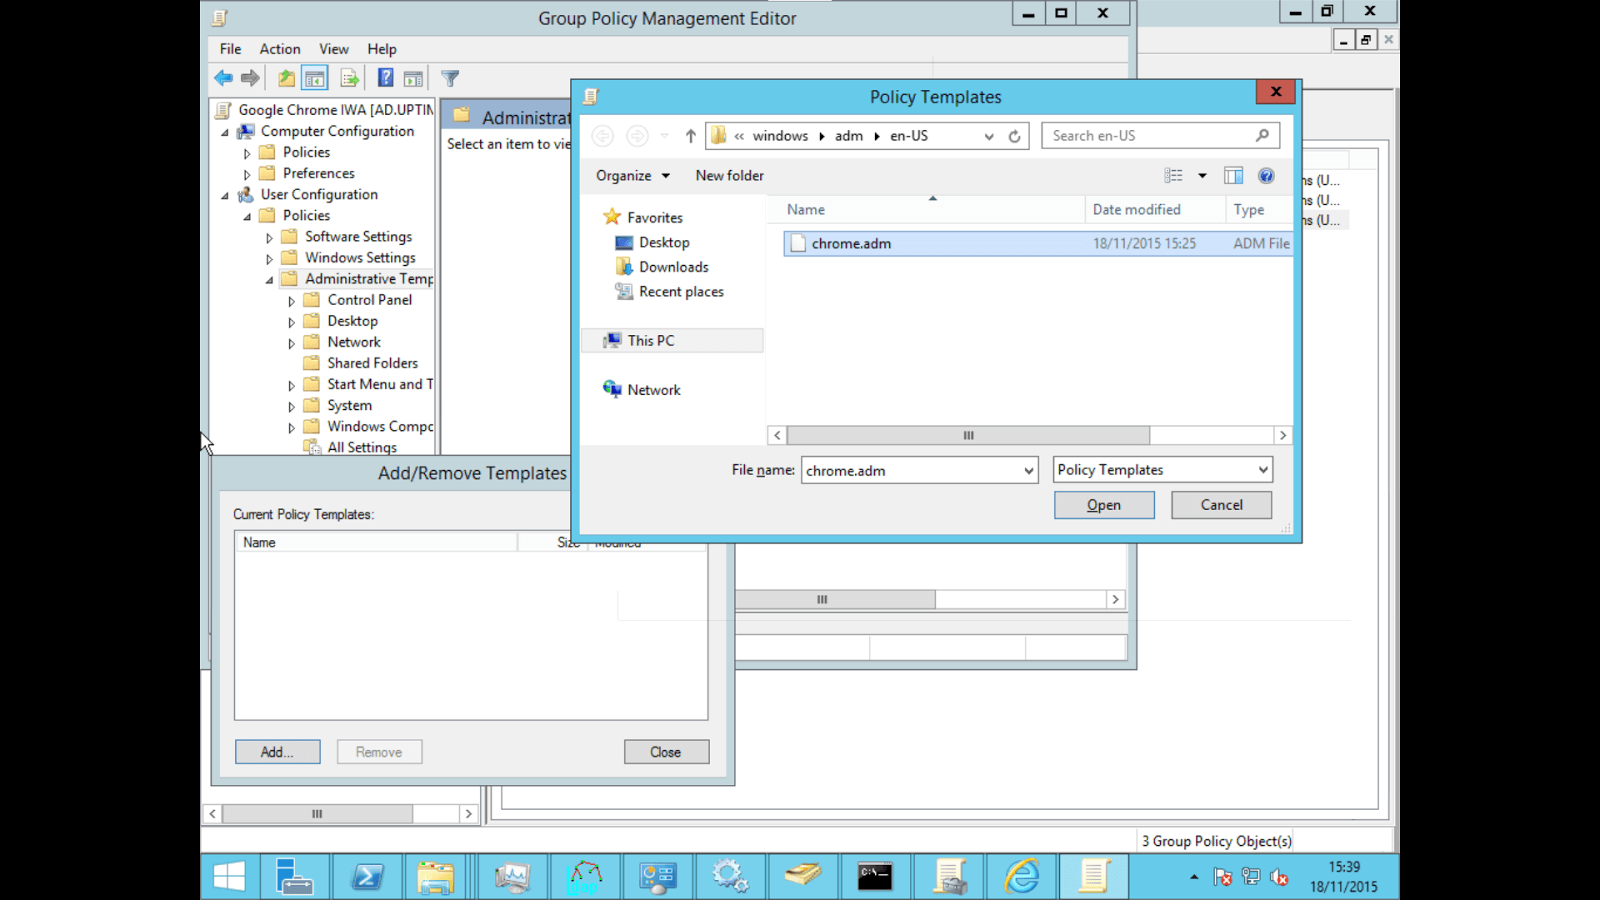
Navigate to User Configuration/Policies/Administrative Template, right click > "Add/Remove a template"
-
Click on "Add" and select the file in the previously extracted folder (policy_template/windows/adm/{langue}/chrome.adm)
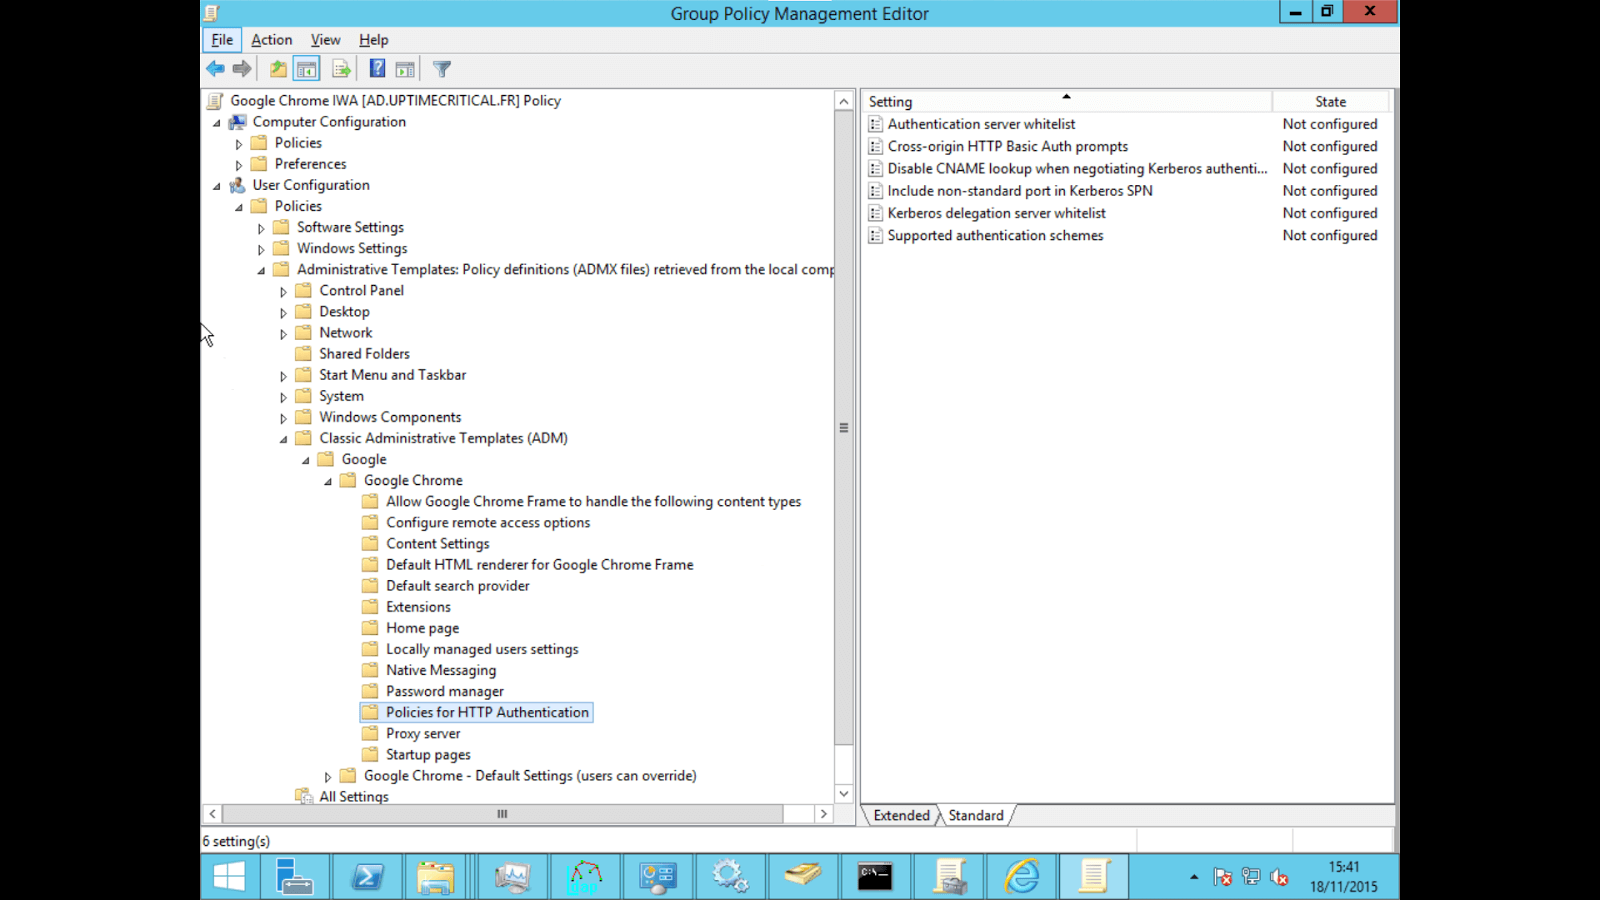
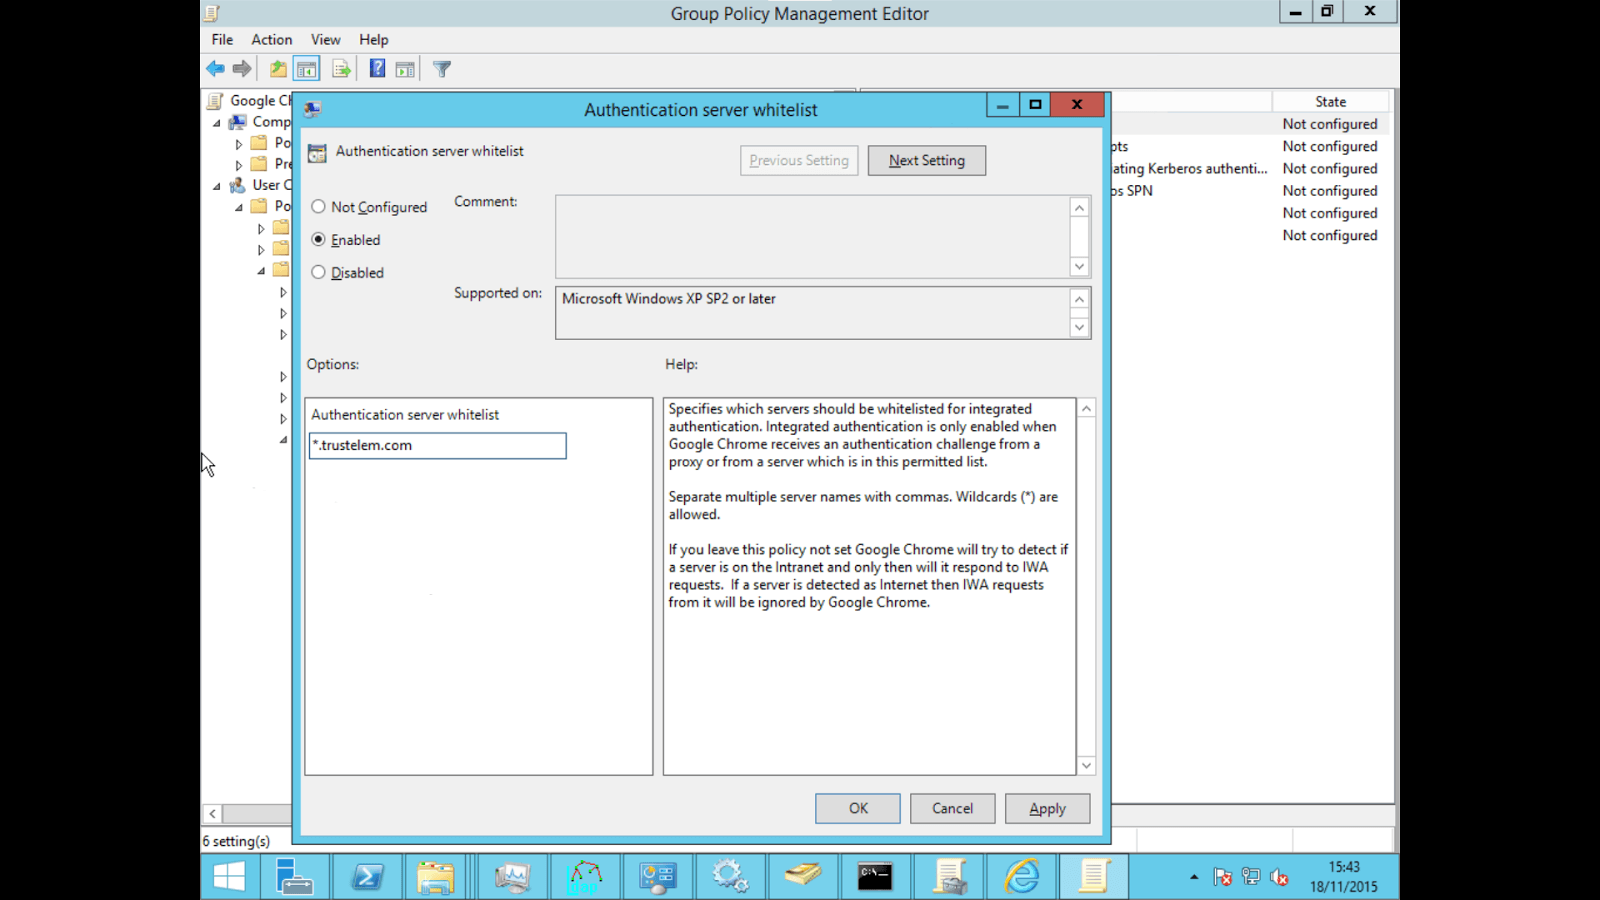
- Navigate to User Configuration/Policies/Administrative Template/Classic Administrative Templates(ADM)/Google/Google Chrome/HTTP Authentication/Authentication server whitelist, right click > "Edit".
- Click on "Enabled" and enter "*.trustelem.com" in the value field
-
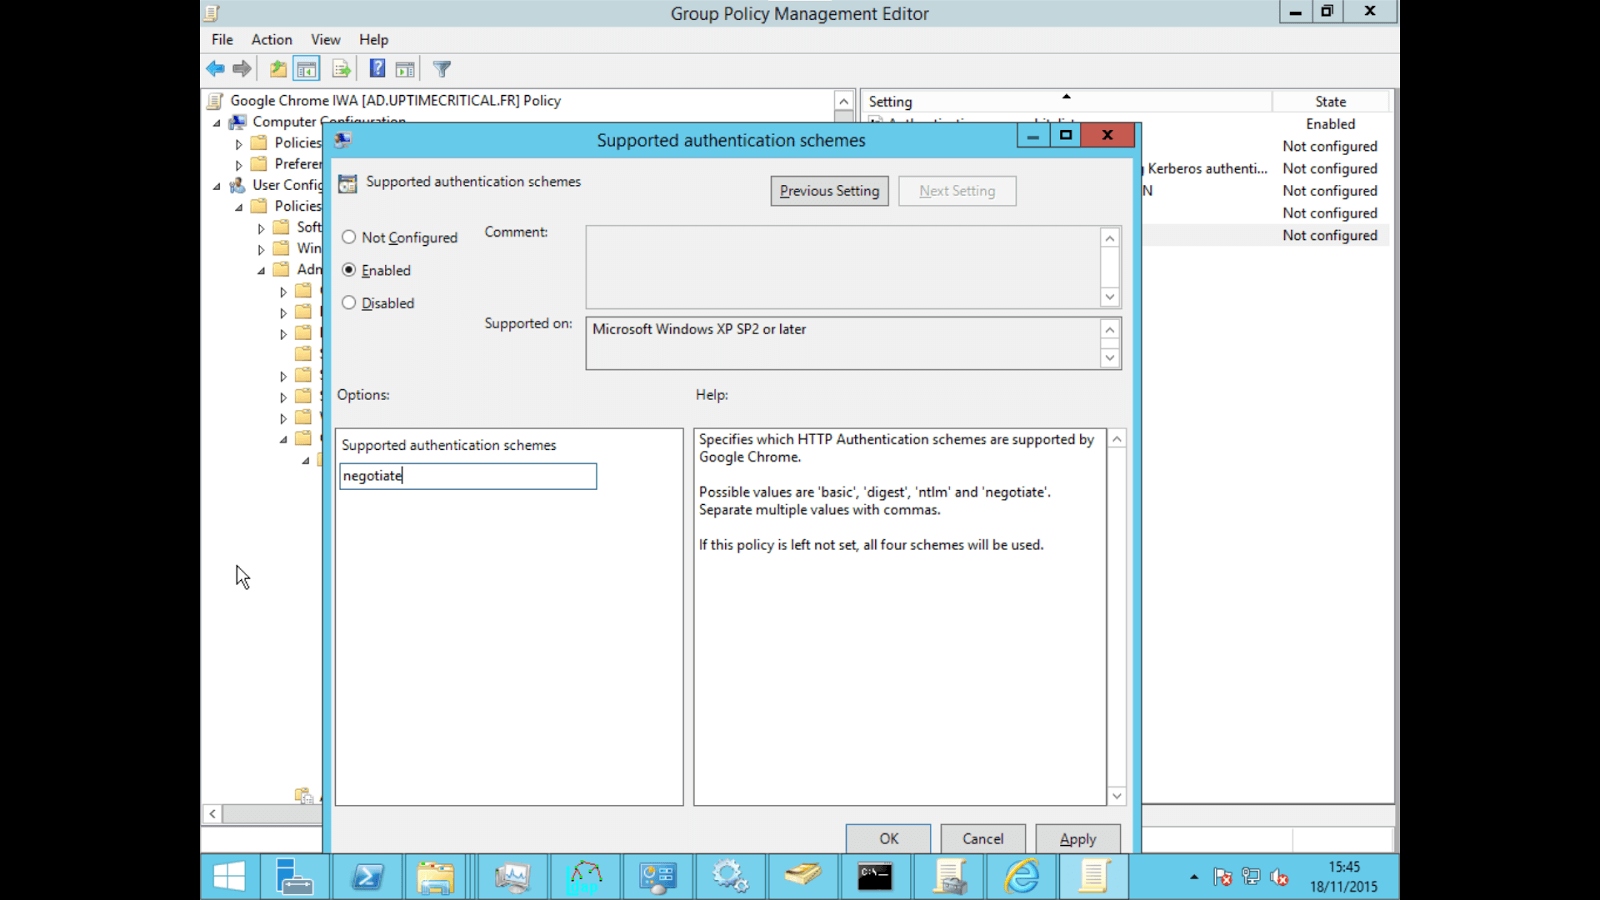
Navigate to User Configuration/Policies/Administrative Template/Classic Administrative Templates(ADM)/Google/Google Chrome/HTTP Authentication/Supported authentication schemes, right click > "Edit"
-
Click on "Enabled" and enter "negotiate" in the value field
- Verify that the GPO is enabled and linked to your domain
Note: with the new Edge based on Chromium, you have to go here: https://www.microsoft.com/en-us/edge/business/download?form=MA13FJ and click on Download Windows XX-bit policy. Then follow the Google GPO process.
-
Connect to a domain controller as a domain administrator
-
Open the Group Policy Management Console (gpmc.msc)
-
Choose an existing GPO or create a new one
-
Edit the policy (Right click > Edit)
-
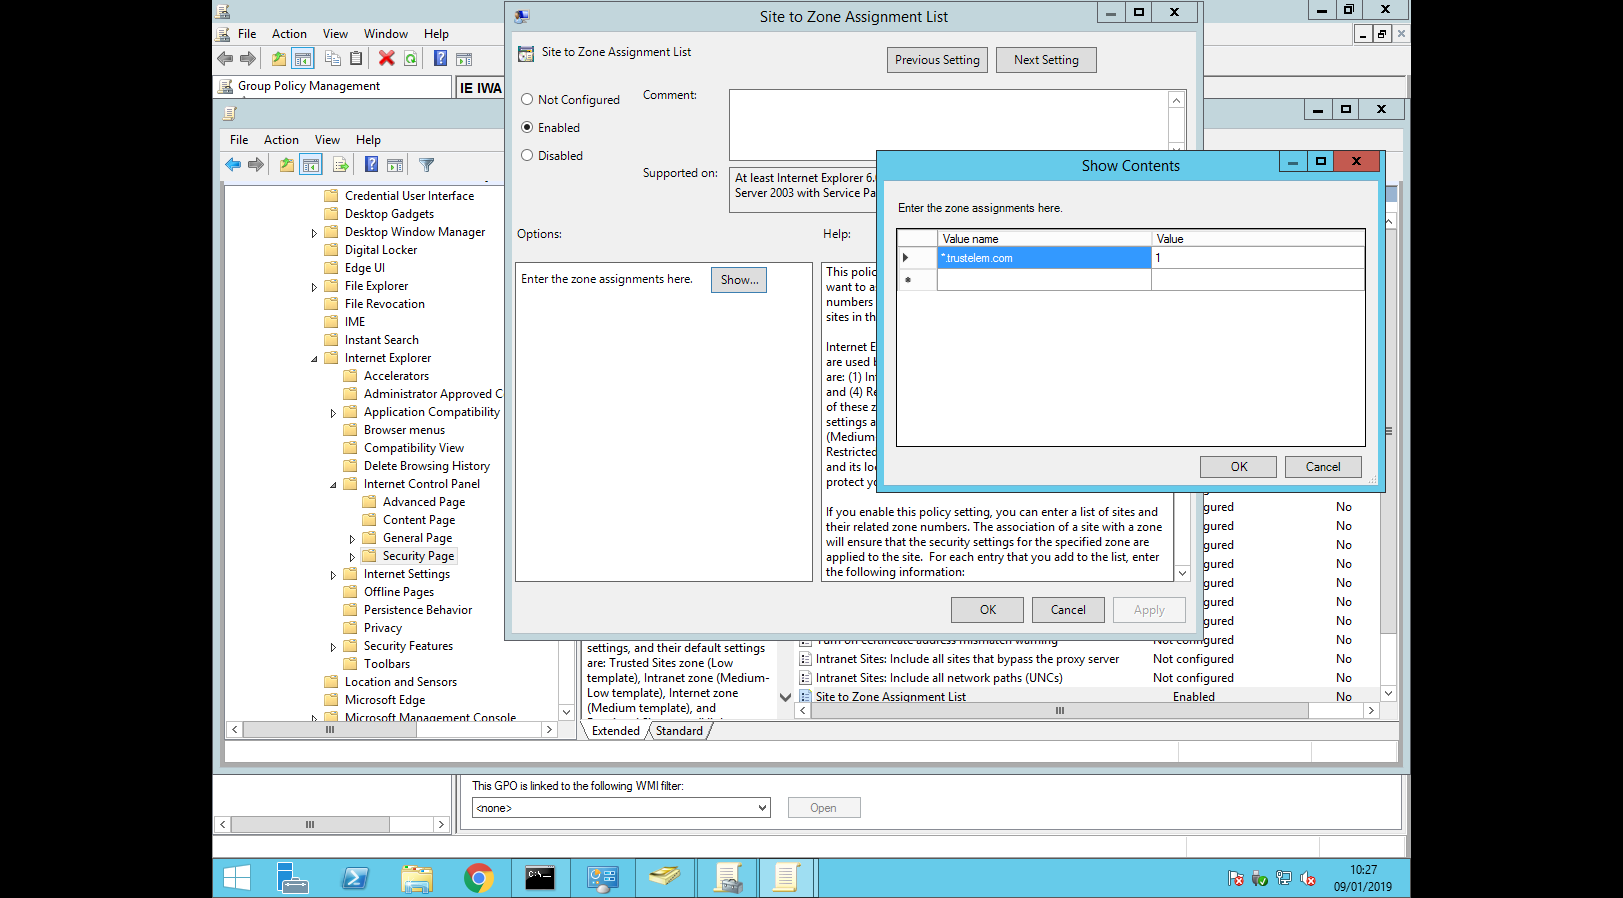
Navigate to User Configuration/Policies/Administrative Template/Windows Components/Internet Explorer/Internet Control Panel/Security Page/Site to Zone Assignment List, right click > "Edit"
-
Click on "Enabled" and enter "*.trustelem.com" in the first field and "1" (Intranet zone) in the second field
-
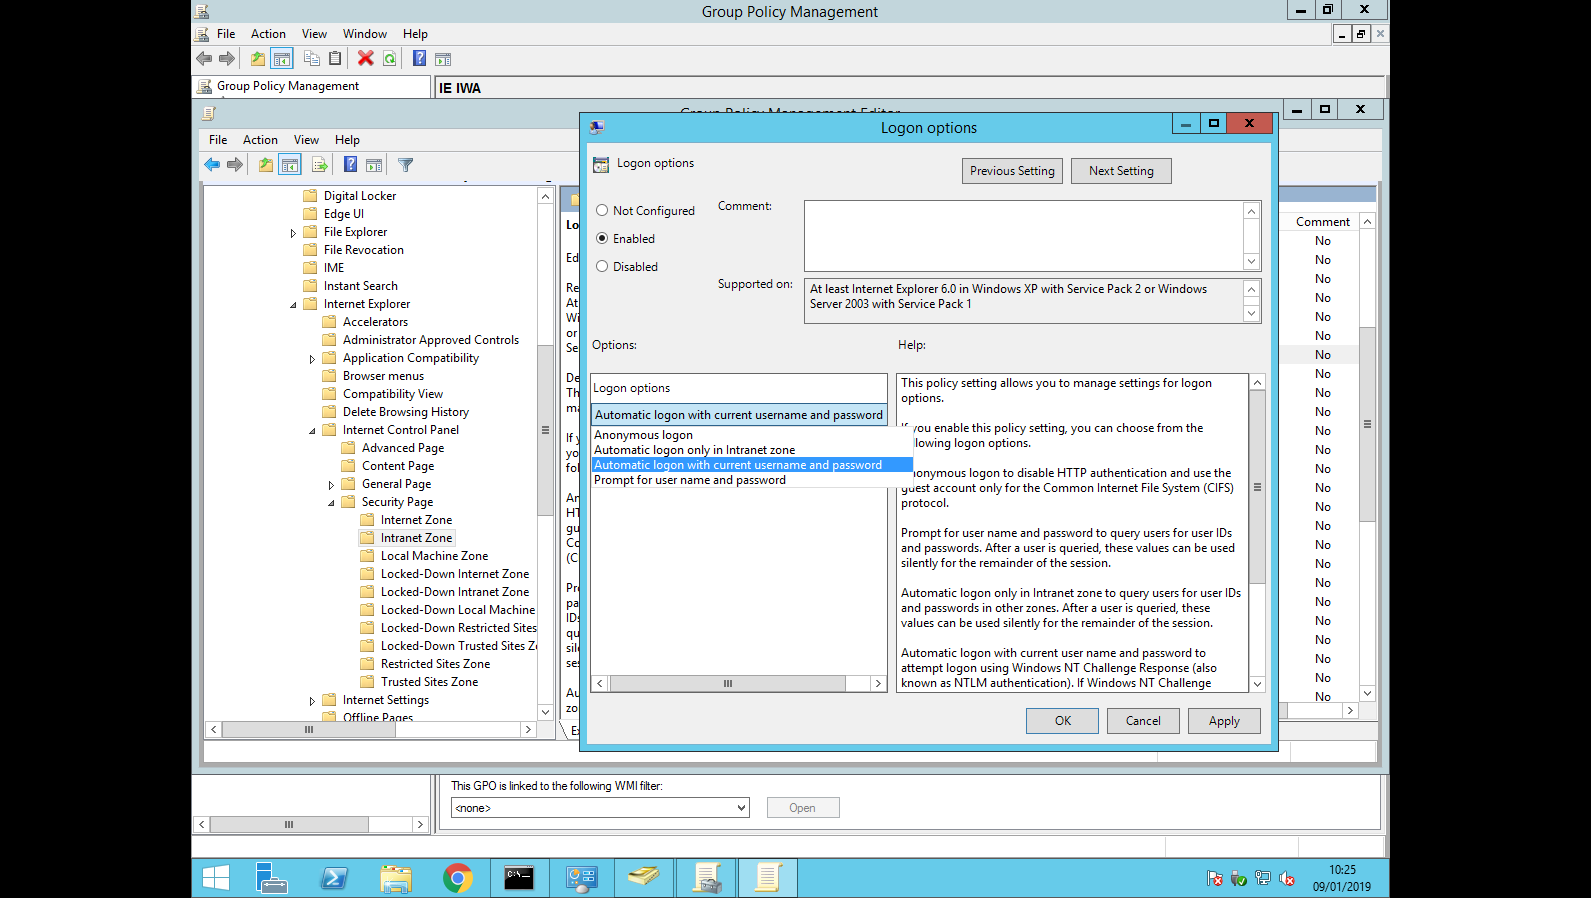
Navigate to User Configuration/Policies/Administrative Template/Windows Components/Internet Explorer/Internet Control Panel/Security Page/Intranet Zone/Logon Options, right click > "Edit"
-
Click on "Enabled" and choose "Automatic logon with current username and password"
- Check that the GPO is enabled and linked to your domain
-
Connect to a domain controller as a domain administrator
-
Download the GPO: https://github.com/mozilla/policy-templates/releases
-
Extract the folder, copy firefox.admx and firefox.adml for windows to your policy folder (usually C://Windows/PolicyDefinitions).
-
Open the Group Policy Management Console (gpmc.msc)
-
Choose an existing GPO or create a new one
-
Edit the policy (Right click > Edit)
-
Navigate to User Configuration/Policies/Administrative Templates/Firefox/Authenticaton/SPNEGO, right click > "Edit".

- Click on "Enabled" then "Show" and enter "https://mydomain.trustelem.com" in the value field
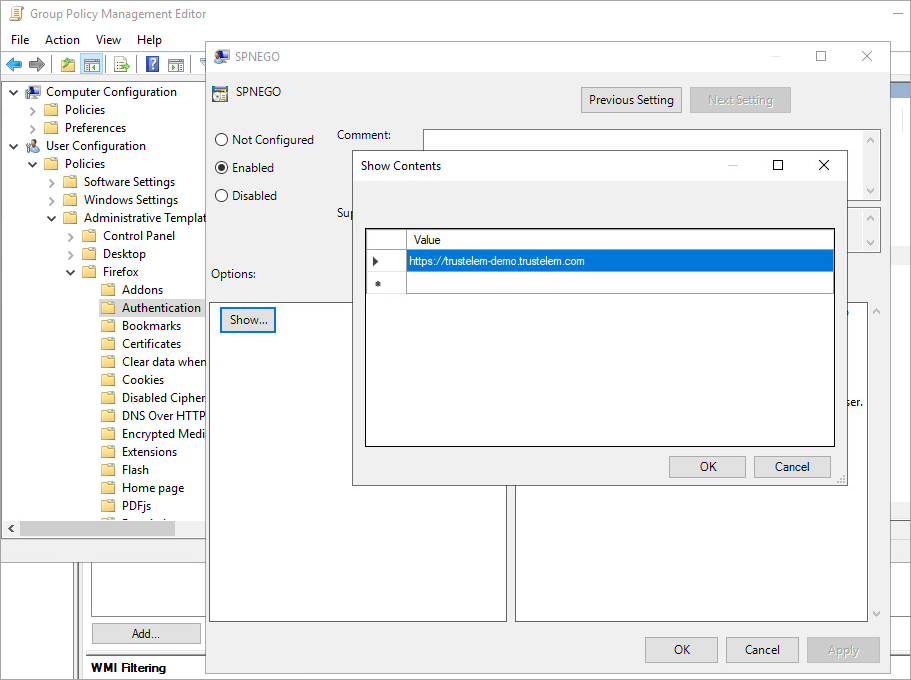
- Verify that the GPO is enabled and linked to your domain
-
In the Windows start menu, search: Internet Options > Security
-
Select Local Intranet, then click on Sites
-
In the Local Intranet window, make sure that Include all local sites (intranet) not mentioned in other zones is checked, the click on Advanced
-
In the Local Intranet window, enter *.trustelem.com to the zone, so as to activate Single Sign-On. Click on OK, the close the Local Intranet window
-
In the Internet Options > Security > Local Intranet window, click on Custom Level... > User Authentication and choose Automatic logon with current username and password
-
Click on OK. Restart Microsoft Internet Explorer / Edge so as to activate this configuration
-
On user desktops, open an Active Directory-authenticated session
-
Launch Firefox
-
In the address bar, enter about:config
-
Select the network.negotiate-auth.trusted-uris parameter
-
Enter your custom Trustelem hostname: mydomain.trustelem.com or add it to the list, separated by commas
-
Click OK
-
Restart Firefox