Authentication with an external IDP
In this page, we will see how to authenticate from an external IDP to a Trustelem subscription.
First, we will setup the authentication from an Azure subscription to a Trustelem subscription, then we will setup the authentication from a Trustelem subscription to another.
From Azure to Trustelem
In this chapter, we'll explain how to authenticate from an Azure subscription to a Trustelem subscription.
For the sake of clarity, we'll use the following terms:
- Azure: the Azure subscription used for authentication.
- Trustelem: the subscription in which we want to be authenticated.
Simple authentication (no Just In Time provisioning)
As there is no Just In Time provisioning yet, the user to authenticate must exist on Trustelem.
-
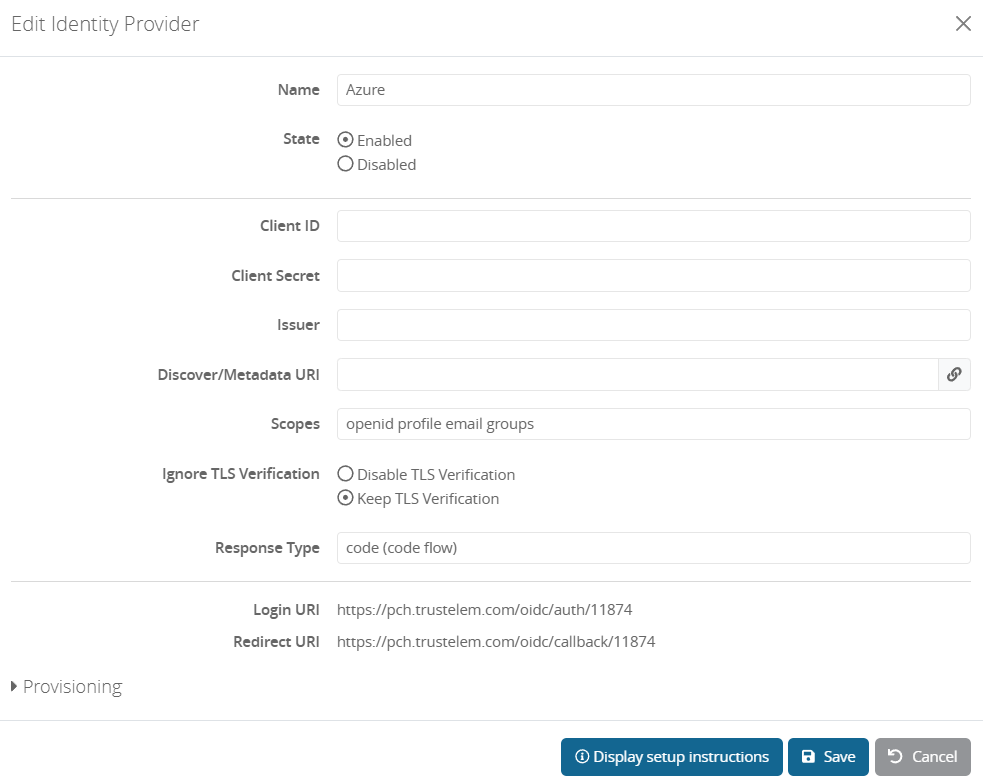
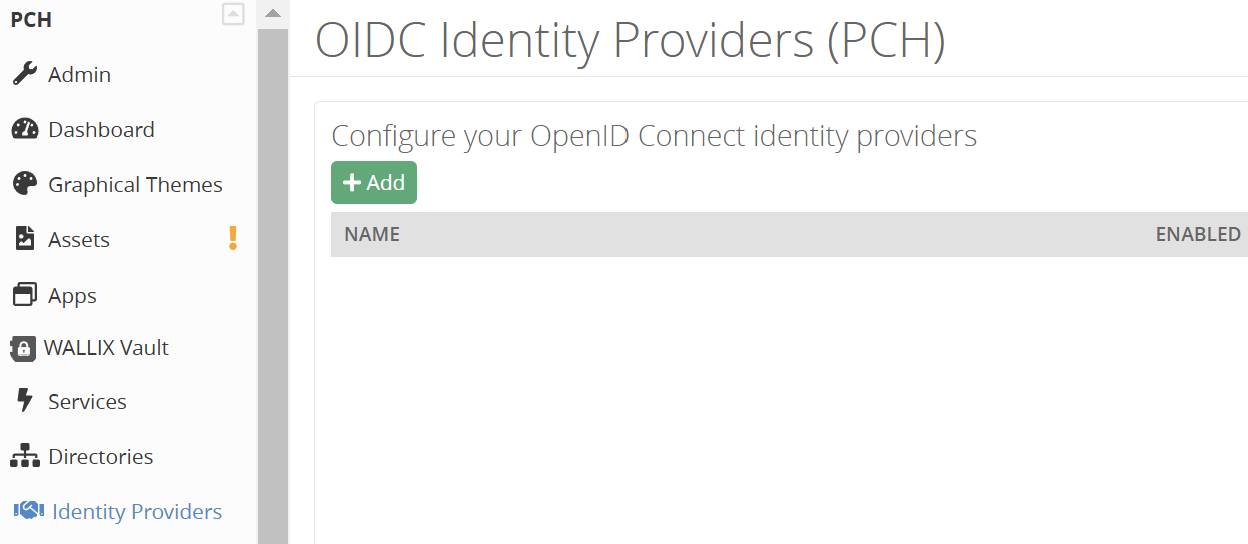
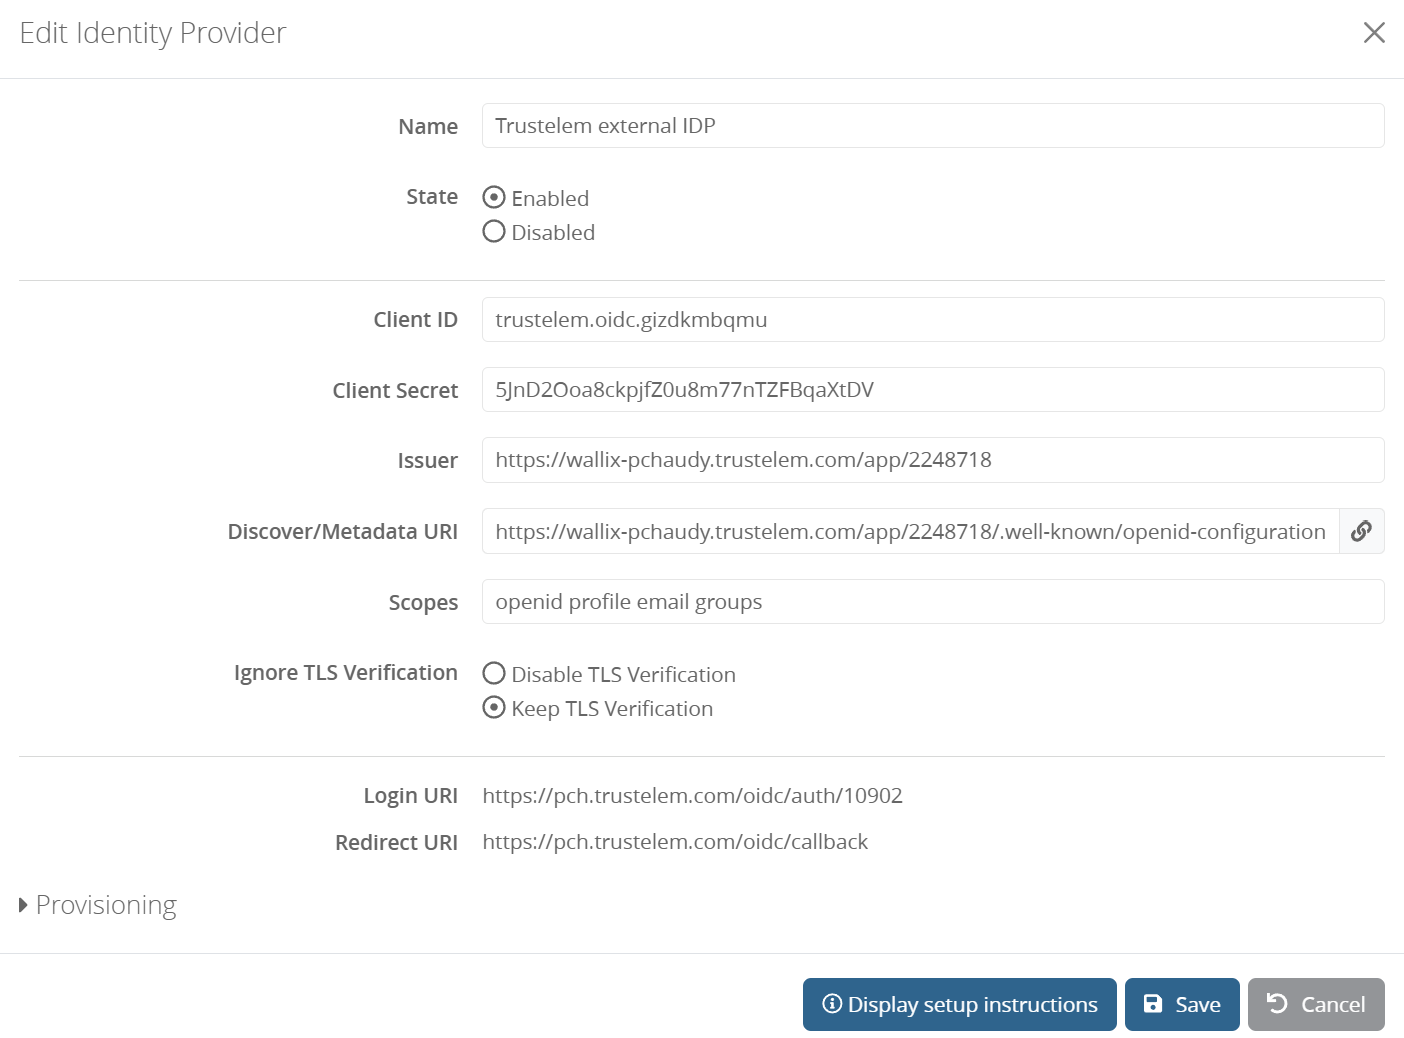
Go on Trustelem and add an external IDP
Identity Providers > Add
Then copy the Redirect URI -
Go on Azure, and add an application
App registrations > New registration
Then in the field "Redirect URI", select "Web" and paste the Redirect URI copied before.
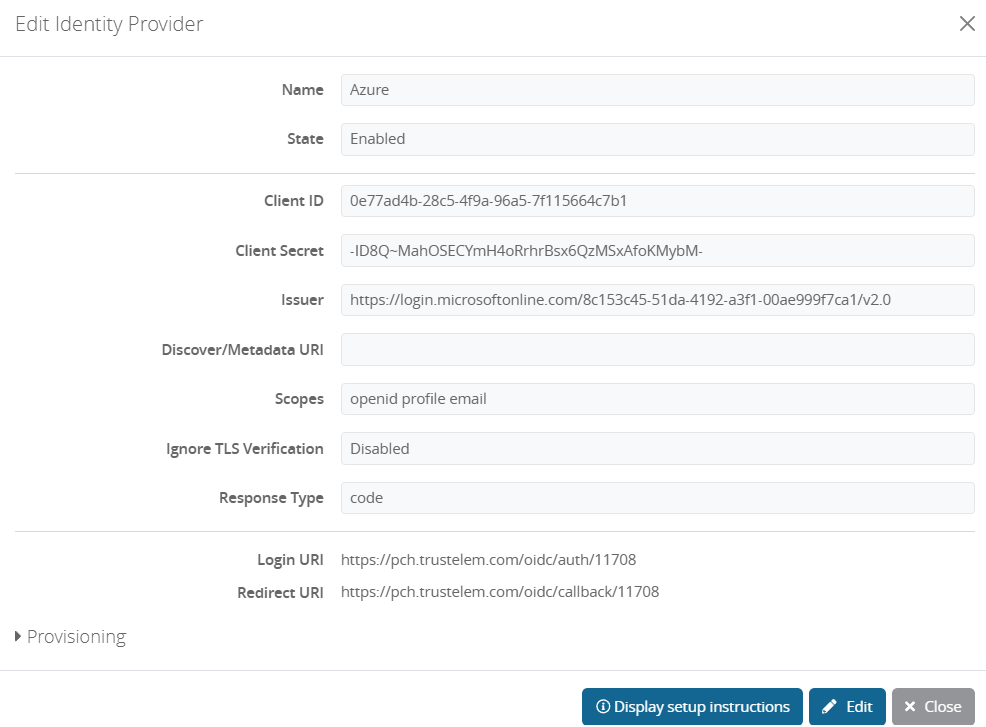
- Add the following values from Azure, to the previous Trustelem external IDP:
-
ClientID:
Copy the Application (client) ID from theOverviewpage -
ClientSecret:
Generate a new client secret fromManage > Certificates & secretsand copy its value -
Metadata URI:
Copy the OpenID Connect metadata document fromOverview > Endpoints
The Issuer will be automatically completed based on this URL. -
Scopes:
Remove "groups", the value should be: "openid profile email"
-
ClientID:
-
Add API rights for the Azure app
- Go to
Manage > API permissions > Add a permission > Microsoft Graph > Delegated permissions - Tick email, openid and profile then save
- Click "Grant admin consent"
- Go to
-
On Trustelem, verify if the user to authenticate exists.
-
Try the authentication, on Trustelem
- Click Azure button, you are redirected to Azure
- Provide the login and password: you are now authenticated to Trustelem
Just-in-time provisioning
When just-in-time provisioning is implemented, step 5 in the previous chapter is no longer necessary.
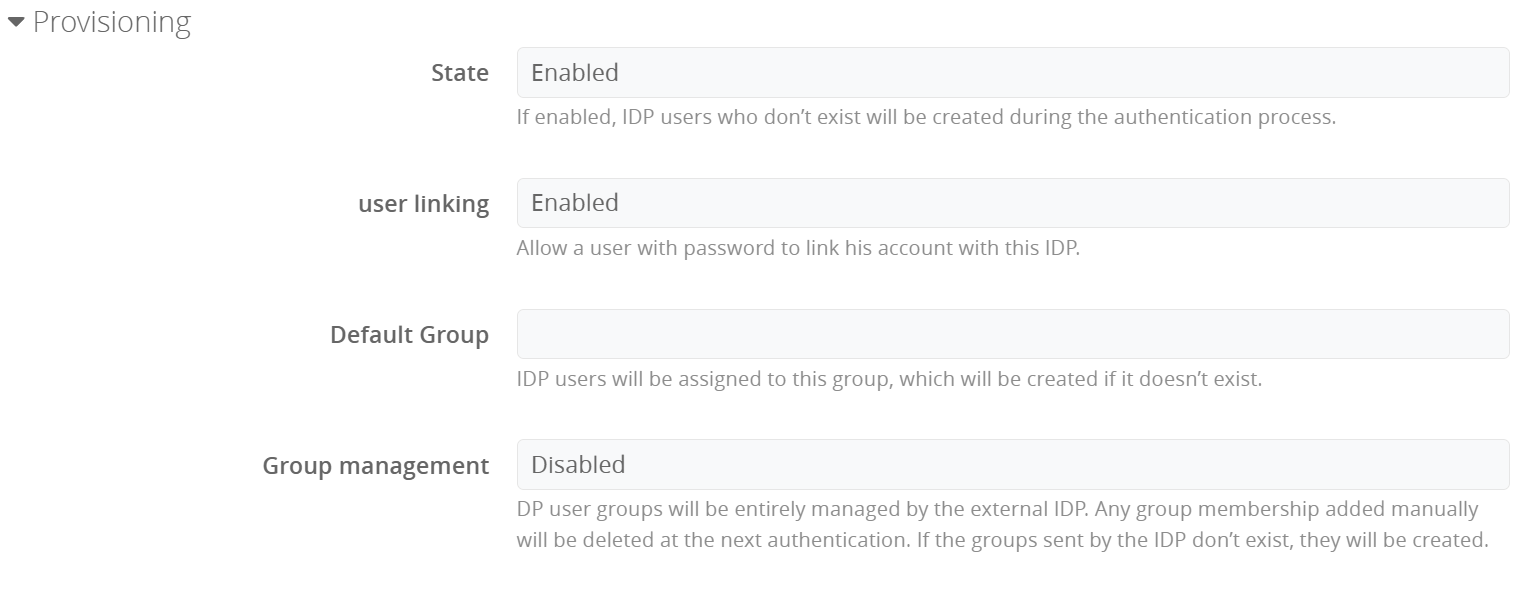
In fact, when Provisioning is enabled, users will be able to authenticate on Trustelem even if they don't yet exist. In this case, an account will be created on the basis of OpenID Connect attributes.
3 additional options are available:
-
User linking
If this option is disabled, users who already exist locally will not be able to authenticate, as the 2 accounts (local + IDP) cannot be merged. -
Default group
Users who authenticate via the external IDP will be added to this group.
If the group does not exist yet, it will be automatically created. -
Group management
Group management for IDP users (and all related local accounts) is based entirely on the OpenID Connect group attribute. The user is automatically added to these groups, which are created if they don't yet exist. In addition, the user is removed from all groups which are not present in the OpenID Connect groups.
On Azure, the scope "groups" is not allowed, as a consequence you need to manually add the group attribute:- On your Azure app, go to
Manage > Token configurationthen add a groups claim - Tick "All groups"
- For the field "Access", if the groups come from Active Directory, you can tick sAMAccountName and the attributes returned to Trustelem will be the group names. If some of the groups don't come from AD, then tick Group ID and the attributes returned to Trustelem will be the group IDs.
You can now save the groups claim. - Add the claim "groups" on your Trustelem External IDP setup
Finally, you can add a prefix to IDP groups, which will be created on Trustelem.
You can also prevent certain groups from being used.
For example,^Internal.*will prevent the use of the OpendID Connect attribute beginning with Internal. - On your Azure app, go to
From an idP supporting OIDC to Trustelem
In this chapter, we'll explain how to authenticate from an idP supporting OIDC to Trustelem (ex one Trustelem subscription to another).
For the sake of clarity, we'll use the following terms:
- Trustelem External: the subscription used for authentication.
- Trustelem Internal: the subscription in which we want to be authenticated.
In other words, we want to authenticate to Trustelem SP with Trustelem IDP.
Simple authentication (no Just In Time provisioning)
As there is no Just In Time provisioning yet, the user to authenticate must exist on Trustelem SP.
- Go on Trustelem External, and add an application
Apps > Add an application - Choose an OpenID Connect application
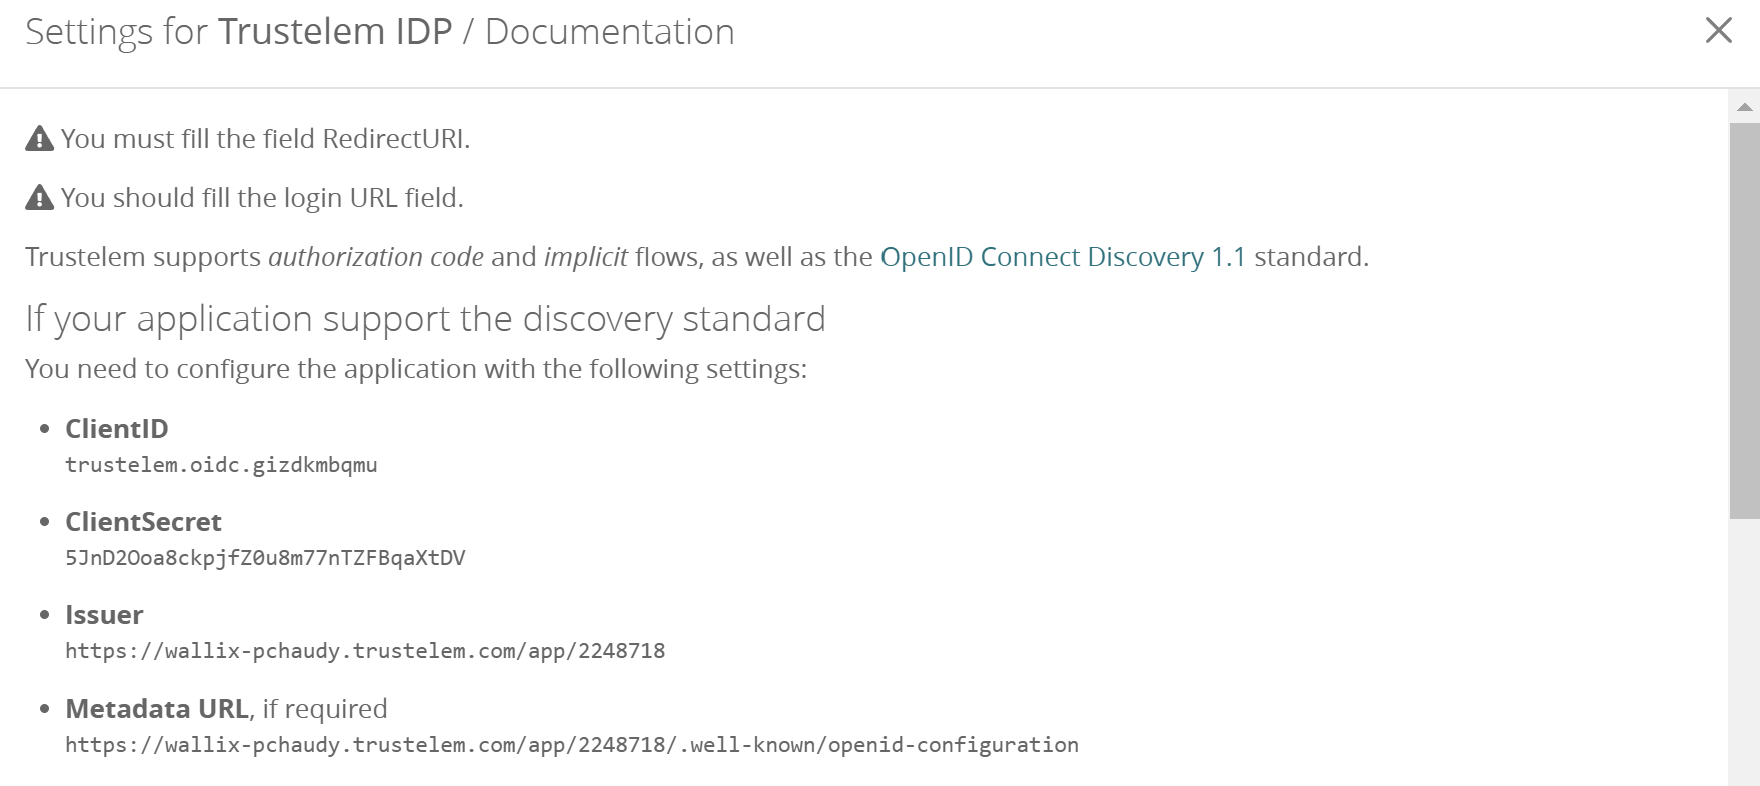
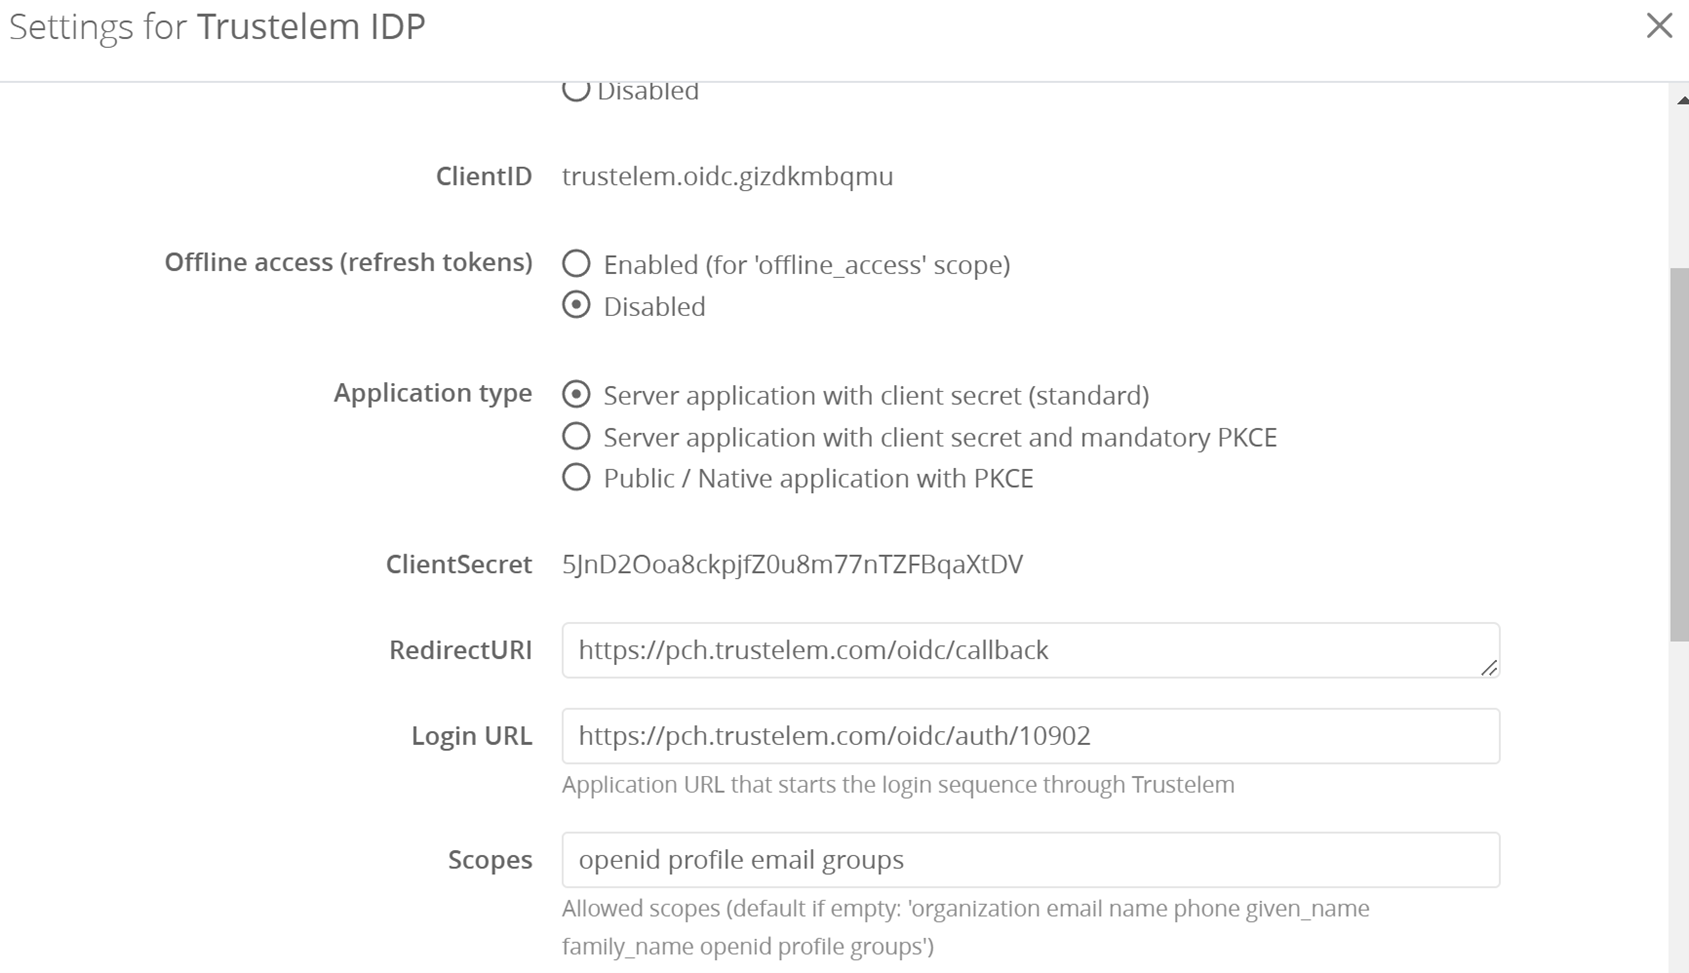
- Click on Display setup instructions, then copy:
- ClientID
- ClientSecret
- Issuer
- Go on Trustelem Internal and add an external IDP
Identity Providers > Add
- Paste the previous copied values
- Copy the Login URI and the Redirect URI then Save the configuration
- Return to the OpenID Connect app on Trustelem External, and paste the 2 copied values
Then, save the configuration.
Optionally, you can complete the scopes with “openid profile email groups” but if the field is empty, the same content will be used by default.
- Now on Trustelem External, create a permission for the user you want to authenticate.
In my example, I want to create a 1 factor permission for my app "Trustelem IDP" for the user pchaudy@wallix.com - On Trustelem Internal, verify if the user "pchaudy@wallix.com" exists.
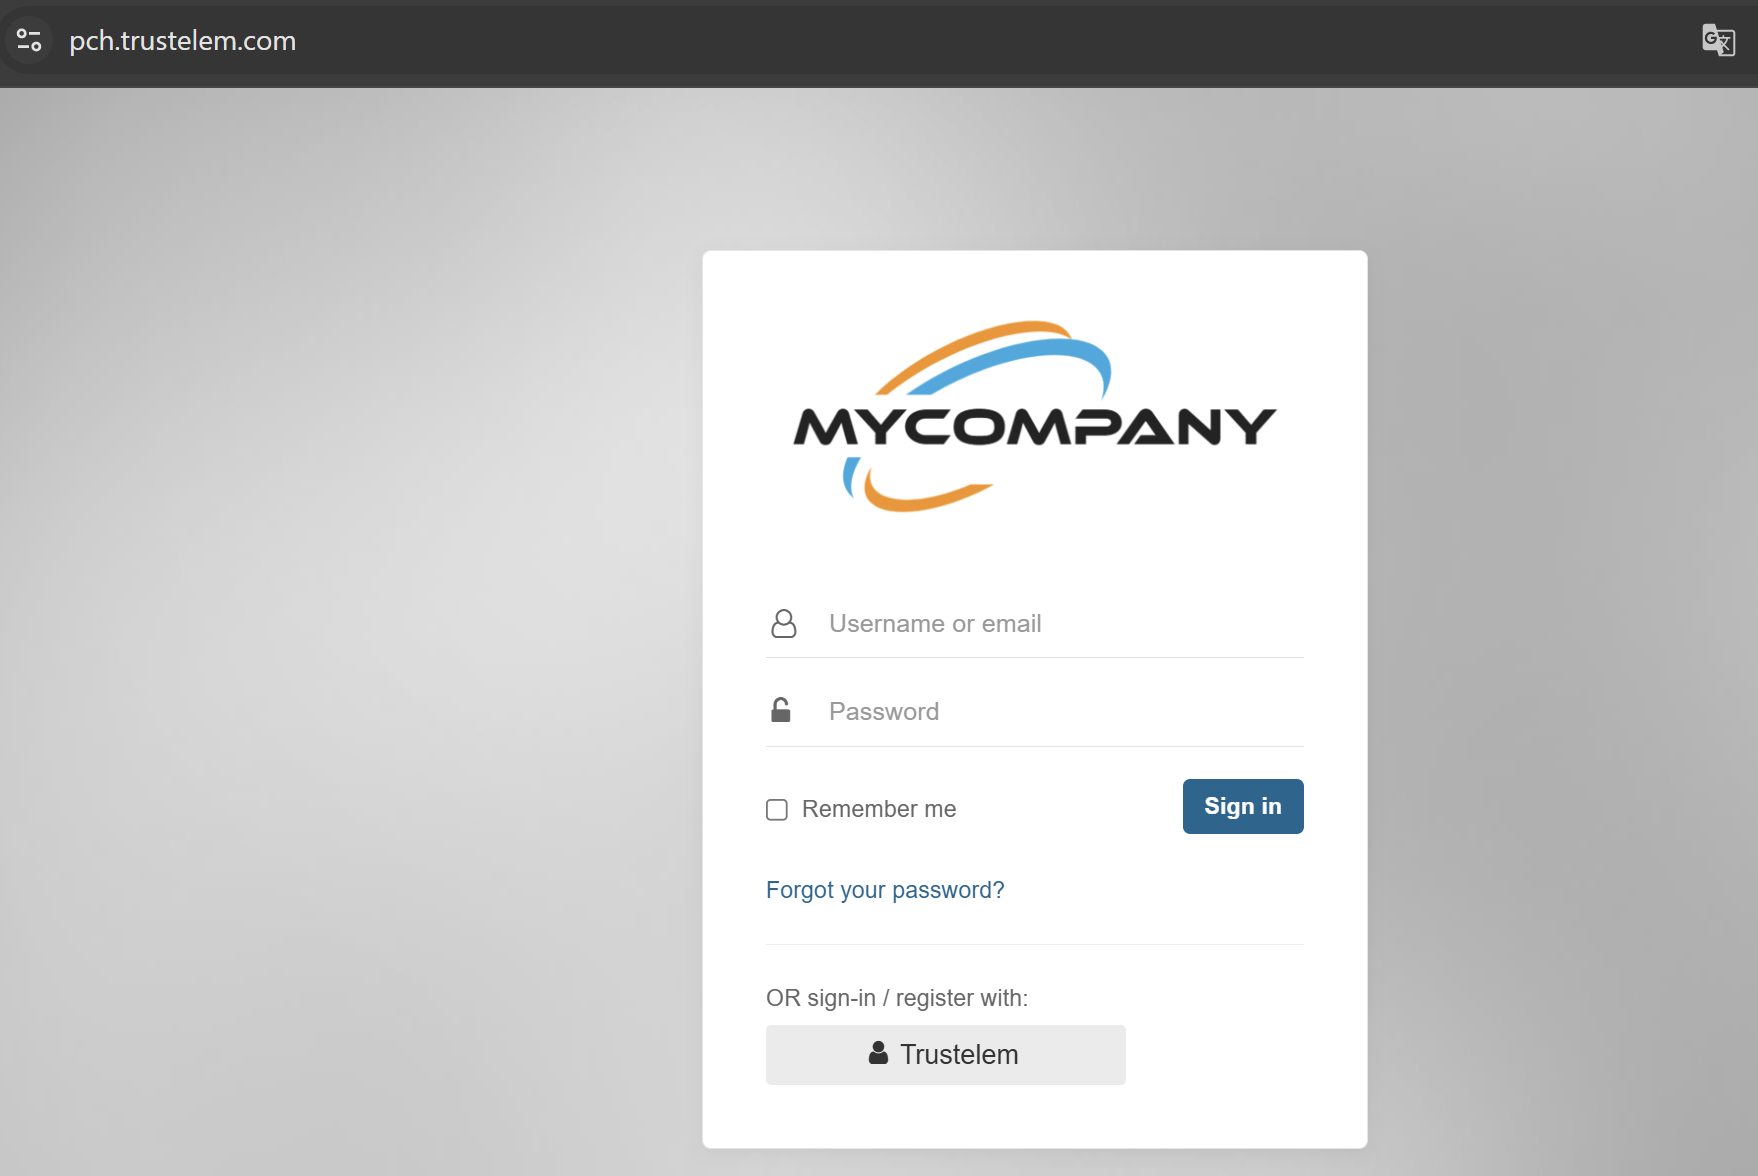
- Try the authentication, on Trustelem Internal
Click Trustelem button, you are redirected to Trustelem External
Then after providing the login and password, you are authenticated to Trustelem Internal
Just-in-time provisioning
Just-in-time provisioning can be implemented after step 8 in the previous chapter. In this case, step 9 is no longer necessary.
In fact, when Provisioning is enabled, users will be able to authenticate on Trustelem, even if they don't yet exist. In this case, an account will be created on the basis of OpenID Connect attributes.
3 additional options are available:
-
User linking
If this option is disabled, users who already exist locally will not be able to authenticate, as the 2 accounts (local + IDP) cannot be merged. -
Default group
Users who authenticate via the external IDP will be added to this group.
If the group does not exist yet, it will be automatically created. -
Group management
Group management for IDP users (and all related local accounts) is based entirely on the OpenID Connect group attribute. The user is automatically added to these groups, which are created if they don't yet exist. In addition, the user is removed from all groups which are not present in the OpenID Connect groups.
To operate, you need to configure the OpendID Connect attribute, or claim, which will contain the groups. For Trustelem "groups" is usually used.
Finally, you can add a prefix to IDP groups, which will be created on Trustelem.
You can also prevent certain groups from being used.
For example,^Internal.*will prevent the use of the OpendID Connect attribute beginning with Internal.
